Monday, October 5, 2020

SignalR Core: Create a pub/sub messaging component


I've been using the publish-subscribe pattern a lot in my applications and I really love it. Many times over the years, this simple yet very powerful messaging pattern helped me keep my code clean and was a key service of the systems I've designed because of the flexibility it offers. 

In one of the projects I am working on though, some of the applicative modules of the app have been moved from the host to a remote client. Both are connected to the same network. 

Moving a module isn't a big deal in my architecture because of the DDD approach that I started taking months ago. Each module can be considered as a bounded context and is independent. 

However, as my messaging service was only capable of dispatching the messages locally, the remote modules cannot listen to the app notifications anymore.

The existing code

The interface of my messaging module is very simple:

public interface IServiceMessaging
{    
    void Subscribe<T>(object subscriber, Action<T> handler) where T : new();
    void Unsubscribe<T>(object subscriber) where T : new();
    Task PublishAsync<T>(T data) where T : new();
}

A client would simply do the following to listen to particular message:

messaging.Subscribe<StatusIoMessage>(this, OnStatusIoMessage);

void OnStatusIoMessage(StatusIoMessage message)
{
    Console.WriteLine($"Received : {message.Type} with {message.Symbol} = {message.Value}");
}

At the moment, the implementation of this service is wrapping a 3rd party lib to do the job. The idea is to extend the communication to the remote modules.

SignalR implementation

After looking around for available solutions, SignalR seemed like a good choice to achieve our goal. Other candidates were studied but SignalR stood out for its simplicity and the fact that it is a key component of .NET Core.

On client side, a HubConnection object is needed to start publishing messages to the remote hub. Here is what the code looks like:

private HubConnection BuildConnection()
{    
    string url = $"https://{address}:{port}{MessagingHub.MainRoute}";
    if (hubConnection == null)
    {
        hubConnection = new HubConnectionBuilder()
            .WithUrl((url))
            .AddNewtonsoftJsonProtocol(options =>
            {
              options.PayloadSerializerSettings.TypeNameHandling = Newtonsoft.Json.TypeNameHandling.Objects;
              options.PayloadSerializerSettings.TypeNameAssemblyFormatHandling =
                    Newtonsoft.Json.TypeNameAssemblyFormatHandling.Full;
              options.PayloadSerializerSettings.Converters.Add(new StringEnumConverter());
            })
            .WithAutomaticReconnect()
            .Build();
        hubConnection.On("__unused__", () => { });

        hubConnection.Closed += HubConnection_Closed;
        hubConnection.Reconnecting += HubConnection_Reconnecting;
        hubConnection.Reconnected += HubConnection_Reconnected;
    }

    return hubConnection;
}

Address, port and main route are properties of my messaging class that are read from application's configuration file.

Note that I am using Newtonsoft Json serializer instead of the default Microsoft Json protocol. This is because of the higher configurability of Newtonsoft. 

BuildConnection is called at the initialization of my messaging service, immediately followed by a connection to the hub:

hubConnection = BuildConnection();
await hubConnection.StartAsync(token);

The publishing of a message is now possible with:

await hubConnection.SendAsync(TargetNames.Publish, message);

Why TargetNames.Publish ? SignalR relates client/hub calls thanks to what they call "target methods". It is basically a key that is used to route the calls. When sending a message to the hub, this key is one of the hub's method names. Here, TargetNames refers to a static class where I've listed all the magic strings that are needed to do the binding.

public static readonly string Publish = "PublishAsync";

Alright now let's have a look on the hub's side. My hub is running in a self-hosted mode, without IIS. More information here

The configuration of the hub (MessageHub) is done in the Startup class:

public void ConfigureServices(IServiceCollection services)
{
    services.AddSignalR(options =>
    {
        options.EnableDetailedErrors = true;
    })
    .AddNewtonsoftJsonProtocol(options =>
    {
      options.PayloadSerializerSettings.TypeNameHandling = Newtonsoft.Json.TypeNameHandling.Objects;
      options.PayloadSerializerSettings.TypeNameAssemblyFormatHandling = Newtonsoft.Json.TypeNameAssemblyFormatHandling.Full;
      options.PayloadSerializerSettings.Converters.Add(new StringEnumConverter());
    });
}

public void Configure(IApplicationBuilder app, IWebHostEnvironment env)
{
    app.UseRouting();
    app.UseEndpoints(endpoints =>
    {
        endpoints.MapHub<MessagingHub>(MessagingHub.MainRoute);
    });
}

Then when my app starts, I need to build and configure the OWIN host:

host = Host.CreateDefaultBuilder()
    .ConfigureWebHostDefaults(webBuilder =>
    {
      webBuilder.UseStartup()
          .UseUrls($"https://{ipAddress}:{Port}");
    })
    .ConfigureServices((context, services) => { services.AddSingleton<MessagingHub>(); })
    .Build();

and finally, this is hub's code:

public class MessagingHub : Microsoft.AspNetCore.SignalR.Hub
{
    public async Task PublishAsync(object message)
    {
        if (message == null)
        {
            throw new ArgumentNullException(nameof(message));
        }

        try
        {
            await Clients.Others.SendAsync(
                TargetNames.GetEventNameFor(message.GetType().Name), message);
        }
        catch (Exception e)
        {
            OnError?.Invoke($"Failed to publish message with e={e}");
        }
    }
}

There you can see the PublishAsync method that will be called by remote clients. Pay attention to the target method name used to call subscribers. In my implementation, I am generating a key based on the type of message being dispatched. GetEventNameFor() only prepends "On" to the type name, but that's just an internal convention of my code. Any key would work on the condition that the same is used by the clients on subscription:

public void Subscribe<T>(object subscriber, Action<T> handler) where T : new()
{
    if (subscriber == null)
    {
        throw new ArgumentNullException(nameof(subscriber));
    }
    
    if (handler == null)
    {
        throw new ArgumentNullException(nameof(handler));
    }

    string eventName = TargetNames.GetEventNameFor<T>();
    hubConnection.On<T>(eventName, handler);
}

Now that everything is wired up, my service can be shared by both remote and local modules. 

public void Subscribe<T>(object subscriber, Action<T> handler) where T : new() 
{
    if (subscriber == null) 
    { 
        throw new ArgumentNullException(nameof(subscriber)); 
    }
    
    if (handler == null) 
    { 
        throw new ArgumentNullException(nameof(handler)); 
    }
    
    if (!isSubscribed) 
    { 
        remoteHub.Subscribe<T>(subscriber, handler); 
        localHub.Subscribe<T>(subscriber, handler); 
    } 
}

public void Unsubscribe<T>(object subscriber) where T : new() 
{ 
    if (subscriber == null) 
    { 
        throw new ArgumentNullException(nameof(subscriber)); 
    }

    if (subscription != null) 
    { 
        remoteHub.Unsubscribe<T>(subscriber); 
        localHub.Unsubscribe<T>(subscriber); 
    } 
}

public async Task PublishAsync<T>(T data) where T : new() 
{ 
    if (data == null) 
    { 
        throw new ArgumentNullException(nameof(data)); 
    }

    try 
    { 
        await remoteHub.PublishAsync<T>(data); 
        await localHub.PublishAsync<T>(data); 
    } 
    catch (MessagingHubException e) 
    { 
        Log?.Error($"Failed to publish {typeof(T)} with exception={e}"); 
    } 
}

I have encapsulated the local and the remote implementations in my global messaging service. The components that were using the messaging service are now connected to the remote modules as well.

In my next article I'll introduce how to add a point-to-point messaging capability to this service with SignalR. 

Thursday, May 7, 2020

Using a unit of work for transactional operations

This article shows an example of how a unit of work can be used in an application with a very basic example. If you have chosen to work with the repository pattern and have concerns about transactional operation, this article might be for you.

Initial context


Say we have an e-Shop where clients can place orders. Our database contains tables for our customers, our suppliers and the orders. A first approach based on the repository pattern would look like the following.


The application controller directly accesses the repositories and updates all the tables sequentially when the client places the order. As each access to the database is isolated, it cannot do all the updates together. This structure works but is subject to inconsistencies. The controller needs to perform the updates in the right order and the desired relations are built one at a time. If the application crashes or if the transaction is somehow interrupted before completion, my database is partially updated and contains segments of information that might not be valid anymore.

Unit of work to the rescue


"A unit of work keeps track of everything you do during a business transaction that affect the database"


On this new diagram, the domain logic accesses the unit of work instead of the repositories. The unit of work encapsulates and exposes the repositories required for the order. With this representation, the purpose of the unit of work becomes clearer:

The client has only one method to make them persistent which is Complete()

The implementation of this method can actually bring the notion of transaction into the picture which is safer in terms of data consistency.

Theoretically, your application will need several unit of works to group all the data that changes together in one place. It does not mean that a repository can only be accessible from one unit of work. We can imagine here a second unit of work to manage the user accounts that would encapsulate CustomerSecuritySettingsRepository and CustomerRepository as well. Make sure you're dealing correctly with concurrent accesses in your repositories and you're good to go.

Here is how the unit of work reflects in most popular persistence tools:
* ITransaction in NHibernate
* DataContext in LINQ to SQL
* ObjectContext in EntityFramework

Wrapping-up


This article demonstrated a very easy setup of the "unit of work pattern" to efficiently and consistently do changes in your persistent storage. Martin Fowler depicts it very well here:
https://martinfowler.com/eaaCatalog/unitOfWork.html


Wednesday, March 4, 2020

Continuous package delivery with Azure DevOps

Background


Since my team started to work with Azure DevOps, we've been exploring its potential progressively : Boards, Repos, Pipelines ...
During the first phase we became accustomed to how each of these unitary services work and the entire team now feels confortable with the them.
At this moment, I consider that the team's efficiency is equal to what it was before using Azure except we are using different tools now.

Stopping our exploration there would have been too bad considering the amount of manual labor that can be automated with Azure. Our development process should ideally converge to what is commonly called a "software factory" where most of the steps from code commits to software package delivery are automated.
I am not saying CI/CD here but the philosophy is equivalent. The continuous deployment of our built system is (at the time of writing) incompatible with the business. The packages are deployed manually in production by running an installer from a USB key. There is no automatic update support and the machines connectivity is limited to workshop automation. Not the ideal situation for DevOps but I believe we will get there sooner or later.

Our first step toward continuous deployment is focused on how each of the system components are developped in the team. The source code now resides in Azure Repo but the integrator is still checking-out the code to build the entire solution at once on his computer which means : build scripts to be updated, versions to be bumped and all binaries packed into a single installer. There is no opening for code reusability between teams: our repositories are private and the components are never archived anywhere.

As I used to work with NuGet packages in the past, all my developments are always packed and published to Azure Artifact. These packages are automatically fetched by visual studio at build time and hence, consumed as binaries and not code. My team really wants to do the same but they have limited knowledge with NuGet, pipeline configuration and artifact management. Besides, the integrator complains about the versioning because he's the only one to know how to increment the versions. I seized that opportunity to think about a solution where my team would only focus on code without ever caring about versioning, packing and publishing of the artifact.

Automation stages


Automation = Azure pipeline and the steps listed below will need to be scripted in an azure-pipelines.yml file


Versioning


It is critical to have a consistent versioning strategy among the development team to easily dissociate a major (i.e. breaking) change from a minor (i.e. compatible) by looking at the version. Besides, the version plays a key role in maintainability as it shall point the developers to the right code snapshot in history to fix whatever bug is found on client site.

I have oriented my team to Semantic Versioning 2.0 (SemVer 2) which is compatible with our traditional versioning strategy.
The version is delimited by the classic 3 digits plus additional metadata as shown below.

Major.Minor.Path-PreRelease.Counter+Build

PartReason for changeNature
MajorIncompatible changes made to public APIMandatory version number
MinorNew features added but backward compatibility preservedMandatory version number
PathBug fixes with backward compatibility preservedMandatory version number
PreReleasePre-release alphanumeric tag to denote the versionOptional build metadata
CounterPre-release version counterOptional build metadata
BuildBuild alphanumeric tag to denote the versionOptional build metadata

This versioning pattern is already supported by Azure Artifacts service and NuGet packaging technology since NuGet 4.3.0+ and Visual Studio 2017.

Now that we have the strategy, we have to define how to stamp this version in the binaries.

GitVersion


GitVersion is one of the tools that promises to be an automated SemVer 2.0 versioning system which will generate the right version for your current code depending on the branch you are on and by looking back at the history of the code.

GitVersion comes as a command line tool that can be executed from any git repository. It works out-of-the-box with GitHubFlow and GitFlow branching strategies and will generate a version without ever modifying the code. The version can then be published as an environment variable or injected into AssemblyInfo.

Below is an overview of the versions generated by GitVersion with the default configuration.


On this diagram, each arrow represents a branching or merging operation. The black labels show the version that is returned by GitVersion when executed from each branch.

Here are the default metadata settings built into GitVersion.

masterhotfixreleasesdevfeatures
Versioning ruleLast tag used as base versionPatch incremented on creationBranch name used as next versionMinor incremented when merging from master or release branch
PreRelease betabetaalphabranch name
CounterIncremented and reset automatically by gitversion based on the references of a branch. Will keep incrementing until a higher digit gets incremented.
BuildIncremented on each commit since last tag

Note: To be used in .NET projects, the attributes AssemblyVersion and AssemblyFileVersion shall be deleted from AssemblyInfo and a dependency shall be added to GitVersionTask package.

Build and unit tests


Nothing special to be said on that part.
My team was already using pipelines with that setup and nothing needs to be modified for continuous package delivery.

Pack


GitVersion published multiple versions as environment variables. The output usually looks like this when printed in a json format:

{
  "Major":2,
  "Minor":3,
  "Patch":0,
  "PreReleaseTag":"alpha.2",
  "PreReleaseTagWithDash":"-alpha.2",
  "PreReleaseLabel":"alpha",
  "PreReleaseNumber":2,
  "WeightedPreReleaseNumber":2,
  "BuildMetaData":"",
  "BuildMetaDataPadded":"",
  "FullBuildMetaData":"Branch.dev.Sha.b5753b8ab047485908674e7a0c956009abff5528",
  "MajorMinorPatch":"2.3.0",
  "SemVer":"2.3.0-alpha.2",
  "LegacySemVer":"2.3.0-alpha2",
  "LegacySemVerPadded":"2.3.0-alpha0002",
  "AssemblySemVer":"2.3.0.0",
  "AssemblySemFileVer":"2.3.0.0",
  "FullSemVer":"2.3.0-alpha.2",
  "InformationalVersion":"2.3.0-alpha.2+Branch.dev.Sha.b5753b8ab047485908674e7a0c956009abff5528",
  "BranchName":"dev",
  "Sha":"b5753b8ab047485908674e7a0c956009abff5528",
  "ShortSha":"b5753b8",
  "NuGetVersionV2":"2.3.0-alpha0002",
  "NuGetVersion":"2.3.0-alpha0002",
  "NuGetPreReleaseTagV2":"alpha0002",
  "NuGetPreReleaseTag":"alpha0002",
  "VersionSourceSha":"0f42b52188fcda73f3e407063db85695ce4ace1a",
  "CommitsSinceVersionSource":2,
  "CommitsSinceVersionSourcePadded":"0002",
  "CommitDate":"2020-02-28"
}

There is a version string especially dedicated to NuGet packages : NuGetVersion. So all there is to do here is to inject that value into the packing task :

 # Package assemblies
  - task: NuGetCommand@2
    displayName: 'Packaging the artifact'
    inputs:
      command: 'pack'
      packagesToPack: '**/*.csproj;!**/*Tests.csproj'
      versioningScheme: 'byEnvVar'
      versionEnvVar: GitVersion.NuGetVersion
      includeReferencedProjects: true
      configuration: 'Release'

Publish


When a build completes, the created package will reside in what Azure defines as the staging directory, which is where the repository has been cloned for the build. This location is not accessible and if the team wants to share the package within the organization, they have to publish the artifact.

In Azure, the artifacts are stored in Feeds. A Feed is a repository for specific types of packages (npm, pypi, NuGet,…). All teams in Azure are free to create one or several Feeds depending on their needs.

Each Feed can have several Views. A View acts as an overlay of the Feed and is intended to filter the content. This concept has been originally introduced to defined several stages before releasing an artifact. By default, each Feed comes with 3 Views : @Local, @PreRelease and @Release, which store respectively development, release candidates and production artifacts. The diagram below summarizes these concepts.


By default, all packages are published into @Local. This View shall only be visible by developers to avoid interlocks during development.
When a release candidate is ready, the integrator shall promote the package from @Local to @PreRelease. The package becomes visible to the testers for verification and validation.
When a package is finally validated, the integrator will generate a new package that he will promote to @Release. The package becomes visible to all stakeholders within the organization.

Each Feed can define a maximum retention time for the package it stores. When the delay expires, the package is deleted. This retention delay is only applied to @Local and promoted packages won't be deleted by the defined policy.

It is up to each team to configure the permission levels for each view.

After configuring our Azure Artifact feed with the proper permission levels and retention time, we were ready to rollout the first automated package publication.
It worked as expected for the test project. One of my input requirements was that my team needs to focus on code only which means that they should never configure the pipeline for their project. As the pipeline configuration file stands in the project repository, I looked for a way of reusing existing pipeline configuration files ...

Pipeline template


Since December 2019, Azure supports templating with the reuse of pipeline config files located in external repositories. My team and I arrived just in time ! :)

Below is the template that I have pushed to a 'TeamProcess' repository:

# File : base-netfull-pipeline.yml
#
# Azure pipeline configuration to build .NET Framework projects and publish
# them as NuGet artifacts into GF.MS.LAS.Machine Azure feed
parameters:
# Solution path in repository
- name: 'solution'
  default: '**/*.sln'
  type: string
# Target build platform
- name: 'buildPlatform'
  default: 'Any CPU'
  type: string
# Build configuration
- name: 'buildConfiguration'
  default: 'Release'
  type: string
# Build virtual image
- name: 'vmImage'
  default: 'windows-latest'
  type: string
# Source feed
- name: 'feed'
  default: '7ea4c5d0-fe57-441e-9fac-f026c9bb1207'
  type: string
# Packages to pack
- name: 'packagesToPack'
  default: '**/*.csproj;!**/*Tests.csproj'
  type: string
# Packages to push
- name: 'packagesToPush'
  default: '$(Build.ArtifactStagingDirectory)/**/*.nupkg;!$(Build.ArtifactStagingDirectory)/**/*.symbols.nupkg'
  type: string
# Does NuGet shall include all dependencies as reference package and/or dlls in the artifact ?
- name: packageAddReferences
  type: boolean
  default: true


jobs:
- job: Build
  pool:
    vmImage: ${{ parameters.vmImage }}
  steps:
  # Install NuGet utility
  - task: NuGetToolInstaller@1
    displayName: 'Installing NuGet utility'

  # Generate SemVer version
  - task: DotNetCoreCLI@2
    displayName: 'Install gitversion'
    inputs:
      command: 'custom'
      custom: 'tool'
      arguments: 'install -g gitversion.tool'

  - task: DotNetCoreCLI@2
    displayName: 'Gitversion setup'
    inputs:
      command: 'custom'
      custom: 'gitversion'
      arguments: '/output buildserver'

  # Restore project dependencies
  - task: NuGetCommand@2
    displayName: 'Restoring dependencies of the package'
    inputs:
      command: 'restore'
      restoreSolution: '${{ parameters.solution }}'
      feedsToUse: 'select'
      vstsFeed: '${{ parameters.feed }}'

  # Build
  - task: VSBuild@1
    displayName: 'Building solution'
    inputs:
      solution: '${{ parameters.solution }}'
      platform: '${{ parameters.buildPlatform }}'
      configuration: '${{ parameters.buildConfiguration }}'

  # Execute unit tests
  - task: VSTest@2
    displayName: 'Executing unit tests'
    inputs:
      platform: '${{ parameters.buildPlatform }}'
      configuration: '${{ parameters.buildConfiguration }}'

  # Package assemblies
  - task: NuGetCommand@2
    displayName: 'Packaging the artifact'
    inputs:
      command: 'pack'
      packagesToPack: '${{ parameters.packagesToPack }}'
      versioningScheme: 'byEnvVar'
      versionEnvVar: GitVersion.NuGetVersion
      includeReferencedProjects: ${{ parameters.packageAddReferences }}
      configuration: '${{ parameters.buildConfiguration }}'

  # Publish assemblies
  - task: NuGetCommand@2
    displayName: 'Publishing the artifact to feed'
    inputs:
      command: 'push'
      packagesToPush: '${{ parameters.packagesToPush }}'
      nuGetFeedType: 'internal'
      publishVstsFeed: '${{ parameters.feed }}'

To reuse this template, a project will create its own azure-pipelines.yml file with the following content:

# File: azure-pipelines.yml
resources:
  repositories:
    - repository: templates
      type: git
      name: TeamProcess

# Template reference
jobs:
- template: Process/Pipelines/net/base-netfull-pipeline.yml@templates

Conclusion


With a few days invested in reading msdn and other literature about the setup of Azure, I managed to achieve the creation of a fully automated NuGet package continuous delivery flow. The automatic versioning of the code is something I never thought of in the past but it is a real game changer. Without it, creating this delivery flow would have been trickier with additional scripting and/or code commits prior to build. The only difficulty I face was related to GitVersion add-on(s) in Azure. Many of them co-exist in the marketplace and it's really confusing. My recommendation is to used DotNetCLI instead which is a robust workaround to the add-on.


Friday, February 21, 2020

Purpose of asynchronous programming (.NET)

Since my first article on the task asynchronous pattern (TAP) with C# .NET, I have successfully implemented several communication libraries with the async/await syntactic sugars.
I will soon need to train my teammates to this pattern and have been working on a series of short articles to get them started.
The purpose of this first article is to introduce the basic concepts of asynchronous programming in C# with lots of visual content, which is probably what is missing the most in the articles found online. My intention here is to simplify the theory to only focus on the essence of asycnhronous programming.

The theory


Asycnhronous programming is meant to capture parts of your code into schedulable blocks called Task. These blocks will be executed in the background with a set of shared ressources called ThreadPool.


Let's take a look on how a classic single-threaded program would execute on a system.


A program (or code) is made of functions of functions. On a single-threaded application, this code will be executed sequentially by the same Thread.

Now if we want to leverage TAP with the same code, here is what the code would look like.


The functions of my code are now captured in Task objects that are scheduled for execution. This time, it is not necessarily the same Thread that will execute each block, it will depend on threads availability in the ThreadPool. However, the code will be executed in the exact same order.

So why is it different ?


If f(x) executes blocking operations (e.g. I/O read), the Thread will remain blocked until the operation completes. That thread will be unavailable for other operations during that time.
If T executes blocking operations, the execution of the Task will be suspended until the the blocking operation resumes. During that time, the Thread will be released and free to execute other Tasks if necessary.

So functionnally, both codes are equivalent but in terms of system resource consumption, they do not work identically.

How is this possible ?


A Task is a stateful object (see TaskStatus). Whenever the code hits an await statement, it will start a state machine for the execution of the Task.
When hitting a blocking asynchronous sub-function, my Task will enter WaitingForChildrenToComplete state and will be put aside. The system can detect when an IO completes and will resume the execution where it was left by reloading the execution context.

Pros and Cons 


  • A code that is executed synchronously will perform better than its asynchronous version. As previouly explained, the execution of asynchronous code requires the creation of a state machine and is dependent on threads availability.
  • Using TAP makes my system more scalable than its synchronous version. The resources of my system are only used when necessary which allows me to support a higher workload 


Asynchronous vs Parallel


A common mistake is to mix these two concepts. The purpose of asynchronous programming is not to offer a simplified framework for parallel processing. Most of the time, you should not even use Task.Run or Task.Factory.StartNew and I believe that's what creates confusion. TAP is not a multitasking framework, it is a "promise for execution" framework.

With that said, TAP provides a few interesting methods if you want to parallelize the execution of your Task objects with Task.WhenAll or Task.WhenAny.


Friday, December 20, 2019

How to move from Jira to Azure DevOps

How to move from Jira to Azure DevOps


This article provides details on how one should organize & administrate Azure DevOps projects with a Jira background. This article won't cover how data needs to be exported from one system to the other, there are plenty of articles covering this part on the web.

Definition of Project


The most striking difference between the two tools is what they call a 'Project'. 

In Jira, it is pretty straightforward as the project has the same meaning as the one defined by the business. A project is a business goal that your team has to attain within a limited timeslot. 

Azure DevOps on the other hand is making thing surprisingly complex. The tool merged the notions of Organizations and Projects and the definitions aren't exactly what you would expect. Creating a Project in Azure equals to creating a division in the company according to Microsoft guidelines.


The question is what's the Microsoft's definition of a business project ?


There are several answers.

Microsoft created a very scalable tool where you can map the structure of your enterprise onto the Organization/Projects notions. In a big company, the natural approach will be to manage divisions as Projects whereas in smaller structure, creating a Project for each business project is still a valid (but not recommended) approach. So how do we have to organize ourselves ?

A backlog filter named Area Path


Microsoft introduced a new notion in backlog management : the Area Path. In a few words, the Areas allows you to categorize the backlog elements. 

This is something you can't do in Jira because each project has its own backlog. In Azure, your division has a main backlog root that is then divided into sub-categories where each of them can be a product, a team or ... a project. This makes it even more confusing because we still don't have a precise definition of the Project. However, this is half of the answer, for each project that your division will manage, create an area.

How do we consolidate the backlogs ?


Making all work items visible from a single place is something that wasn't possible with Jira out-of-the-box. Each project has its own backlog, its own team and its own scrum board. That's one of the rare drawbacks that I experienced when using Jira.

In Azure it becomes possible thanks to the hierarchy of the area paths. In the project settings, make the root area path 'include sub-areas' and boom, the division's backlog now makes all work items visible and displayable in one scrum board. Fantastic ? Hum... not really.

Although it can be helpful for a product owner to have a global overview, you easily find yourself flooded with work items that have no meaning out of their context. Let's assume you have an epic named 'Remote control' in 2 of your area paths. Flattening your backlog will display 2 epics with the same name at the same level which goes against clarity. Even worst, you have absolutely no idea of what the user stories are about when you look at them, mixed with stories related to other projects.

Fortunately, Azure includes backlog filters that are helpful to filter by area path and show relevant information only. Two remarks about this:

  • it comes back to having 2 distinct projects
  • it is probably a bug but using the filters removes the hierarchichal view of the work items which is a pity

What about teams ?


In Jira, again, the notion of team is straightforward. You add all the stakeholders in the settings, assign the roles and you're good to go.

In Azure, again, a Team is not what you think it is. First of all, keep in mind that creating a team will automatically create:

  • An area path (you can uncheck this one)
  • A dashborad
  • A backlog (and hence a scrum board)
  • Velocity/Burndown statistics

Each Team has the possibility of defining their own iteration path (e.g. length and start/stop dates of sprints).

Now, you have 2 choices:

  • Either this is something that is interesting for your division's structure where you have several teams working on several projects
  • OR you have 1 multidisciplinary team working on several projects and you're not intereseted in having extra dashboards, iteration paths,...

So far, I have been working with one single Team in my division but we are already seeing the limitations:

  • Navigation in the backlog is really not easy : the filtering by Area Path is working well but you have to be always careful with creation of new work items and ensure that they are categorized in the right area path
  • When filtered, the work items order cannot be modified
  • If you're looking for the closed items with the filters on, you won't find them
  • The overview shown in Plan is completely pointless and you don't have a clear vision of your project's roadmaps

A compromise would be to create additional Teams without a dedicated Area Path and to map them onto the existing Area Paths of the backlog. I really think that it becomes heavy but it might enhance the overall experience with Azure.

EDIT 20/12/2019: We finally created one team per project and we've been using it for a while now. It really makes the navigation easier which helps a lot for backlog refinements. Another good point is that the 'Plan' overview becomes useful because it shows the roadmap for each 'Team' (a.k.a 'Project'). So to conclude, Team is the second half of the definition of a 'Project' for Microsoft Azure

Mapping of the work items


Jira allows the creation of Epics for groups of features or long-term goals and user stories for the tasks to be executed going forward. Each story can be divided into sub-tasks and the completions of all of them trigs the completion of the user story. 

Azure introduced an additional levels to this scheme.


Microsoft's guidelines to map your tasks into Azure are summarized in the following table:

Azure work item Completion time
Epic Months
Features Weeks
User story Days
Task Hours

Still confusing, especially when we work in small iterations without a clear long-term roadmap. The time ranges that Microsoft provides is perfectly valid but it tends developers to think with durations and not efforts. That's probably why they've drawn a separation line between Features and User Stories to let management figure out the roadmap and development team focus on the efforts which is the ideal (but unrealistic) approach.

To frame this a little better, here is a more complete table for the mapping:

Azure work item Alias Azure work item Examples
Area Path Project Months/Years Coffee maker robot
Epic Goal / Initiative / Final Outcome Months Deplacements / Grinding / ...
Features Step / Module / User-facing function Weeks One-click coffee preparation
User story Action / Testable requirement Days As a user, I can stop the robot from the mobile application so that I keep control on the coffee preparation cycles
Task Sub-Action Hours Find a nice-looking flat icon for the button

With that said, I see room for improvement in Azure:

  • You can start working on Tasks before moving a story to 'Active'
  • Completing the sub-tasks do not trig the completion of the user story
  • Same goes to user stories and features

Note : It can be confusing at first but Azure proposes a new type of board to have an overview of the on-going activities within a sprint, the Taskboard. I really like the idea because visualizing the sub-tasks in Jira wasn't convenient


Friday, September 13, 2019

C# Asynchronous programming

In this article, we'll focus on C# async/await keywords and explain what they're intended for.

When ?

Asynchronous programming has been mainly thought to avoid blocking a thread because of an I/O operation (serial port read, http request, database access ...). It can also be used to handle CPU-bound operations like expensive calculations.

How ?

C# has built-in syntactic sugar keywords (async/await) for easily writing asynchronous code without dealing with callbacks and helps making asynchronous calls on existing synchronous interfaces/APIs (although it is really not the recommended approach). It is known as Task-based Asynchronous Pattern (TAP).

This entire mechanism relies on Task<T> object.

Task vs Thread

A Thread is a worker. It is an OS object which executes a job (e.g. some code) in parallel. 
A Task is a job that needs to be scheduled and executed on available workers, eventually in a ThreadPool. They are a promise for execution.
A ThreadPool is a group of Threads that .NET will handle for you. They are system-shared workers that your application can rely on to execute jobs asynchronously.

With an embedded SW engineering background, it is very tempting for me to instantiate my own Thread objects in my application. It gives me confidence on how my application's jobs are scheduled over time. But generally speaking, it's a mistake.

Threads are expensive objects in terms of memory (1MB / thread in .NET) but also in terms of performances. On a resource-limited system, having several threads per application will exhaust the CPU and slow your system down. .NET will manage the ThreadPool for you, keep threads alive for reuse and take your system's limitations in consideration when doing so. In short, with .NET, prefer using Task.Run for multithreading.

Note: The only situation I came accross that required the creation of my own Thread was when developping a Windows service. When operating system exits, and your background service has pending Task objects in the background, it won't be stopped. This is because the ThreadPool cannot be released.

Definitions

Before showing some examples, we need to understand the meaning of the keywords:

async 

Method declarator which allows the usage of await within method's body.

public async static void RequestDataOverHttp()
    {
        await RequestDataAsync();
    }

Keep in mind that declaring a method as async does not make it asynchronous. If await was removed from the code above, the method would execute synchronously despite async declarator.

await

Start execution of a method and yield.

 public async static Task RequestDataOverHttp()
    {
        await RequestDataAsync();

        // The code below won't be executed until RequestDataAsync returns
        Console.WriteLine("Data received"); 
    }

This keyword creates a state engine in the background to handle job completion. This is what's going to happen:

  1. Module A calls RequestDataOverHttp
  2. RequestDataOverHttp schedules execution of RequestDataAsync on the same thread. Here, await captures the SynchronizatioContext before awaiting
  3. await yields and A continue its processing
  4. RequestDataAsync completes and unlocks internal state engine. .NET looks for an available Thread in ThreadPool to resume RequestDataOverHttp. That thread picks up the SynchronizationContext of the original thread.
  5. Console finally shows "Data Received"

The most complicated aspect of this mechanism is in understanding how the processing can continue on same thread when hitting an await statement.That is possible thanks to SynchronizationContext and TaskScheduler objects.

SynchronizationContext & TaskScheduler

SynchronizationContext

It is a representation of the environment in which a job is executed. Concretely, this object contains a worker which is usually a thread but can also be a group of threads (ThreadPool), a network instance, a CPU core...

This is what allows a code to be executed on another Thread. For instance, in WPF & Forms, the edition of controls is only possible from UI Thread. By calling control.BeginInvoke from a regular thread, we're placing a delegate to be executed onto the UI Thread.

Under the hood, delegates are queued with Post() or Send() into the context. That's basically what a context does, it's a sort of queue of work for a Thread.

TaskScheduler

We've seen that calling control.BeginInvoke will queue a delegate for UI Thread, which means that it schedules work. This method is part of ISynchronizeInvoke which is part of Control object.

When creating a Task, the scheduling behavior depends on the situation we're in:

On Task creation, the work will first try to be scheduled into the SynchronizationContext of the current thread.
As all threads do not necessarily have a SynchronizationContext, TaskScheduler will schedule the work using the ThreadPool as default choice.
If the Task has been created into another Task, the context of the primary Task will be reused (this is configurable).

Here is a more detailed summary of situations:

Calling thread Has SynchronizationContext ? Behavior
Console application No Default TaskScheduler used (ThreadPool)
Custom thread No Default TaskScheduler used (ThreadPool)
ThreadPool Yes All Tasks executed on ThreadPool
UI Thread Yes Tasks queued on UI Thread
.NET Core web application No All Tasks executed on ThreadPool
ASP.NET web application Yes Each request has its own thread. Tasks are scheduled on these threads.
Library code Unknown Unexpected behavior, potential deadlock

Task.ConfigureAwait(bool continueOnCapturedContext)

The default behavior of await can be overriden by calling ConfigureAwait(false):

 public async void ReadStringAsync()
    {
    await httpResponse.Content.ReadAsStringAsync().ConfigureAwait(false);
    }
With this call, we indicate that the Task does not have to be executed in caller's context which means that it will be scheduled on the ThreadPool.
When to do that ? If caller is UI Thread and the method does not update the UI elements, doing so is actually better in terms of performances as it will be executed in parallel. Also, it prevents from deadlocks if caller was doing something like ReadStringAsync().Result (see good practices below) which is also why it is a good practice to call ConfigureAwait(false) in library code.

 Usage

Case 1 : I/O bound code

The application awaits an operation which returns a Task<T> inside of an async method.

Synchronous version of an I/O bound method

public string RequestVersion()
    {
        string response = String.Empty;
    
        // Send request
        client.Send(new GetVersionFrame());
        // Wait response
        return client.WaitResponse();
    }
Asynchronous version it

public async Task<string> RequestVersionAsync()
    {
        string response = String.Empty;
    
        // Send request
        await client.SendAsync(new GetVersionFrame());
        // Wait response
        return await client.WaitResponseAsync().ConfigureAwait(false);
    }

Case 2 : CPU bound code

The application awaits an operation which is started on a background thread with the Task.Run method inside an async method.

Synchronous version of a CPU bound method

public List<double> ComputeCoefficients()
    {
        List<double> coefficients = new List<double>();
    
        coefficients.Add(ComputeA());
        coefficients.Add(ComputeB());
        coefficients.Add(ComputeC());
        return coefficients;
    }
Asynchronous version it

public async Task<List<double>> ComputeCoefficientsAsync()
    {
        List<double> coefficients = new List<double>();
    
        coefficients.Add(await Task.Run(() => ComputeA()));
        coefficients.Add(await Task.Run(() => ComputeB()));
        coefficients.Add(await Task.Run(() => ComputeC()));
        return coefficients;
    }

Good practices

Naming

Name asynchronous methods with Async suffix to indicate that the call won't block the caller's thread.

public async void FooAsync()
    {
        await client.DownloadAsync();
    }
Async indicates that the method will offload part of the work to an underlying API (ex: OS networking API).

CPU-bound work

Consider using background threads via Parallel.ForEach or Task.Run for CPU-bound work instead of await unless you're working in a library where you can't do that (see below).

Don't block in async code

1. Bad code
public void Foo()
    {
        client.DownloadAsync().Result;
    }
or 2. Very Bad code
public void Foo()
    {
        Task.Run(() => client.DownloadAsync().Result).Result;
    }
At some point, the async method will be executed/resumed on ThreadPool but if there is no available threads, you'll end with a deadlock. If the example 1 is called from the UI Thread, the task is queued for the UI thread which gets blocked when it reaches Result call --> deadlock.

As asynchronous code relies on execution context, don't block an asynchronous method unless you own the calling thread or if it's the application's main thread. As a general rule : call sync code from sync code and async code from async code, try to not mix them. The application's top layer has control over the context, it can chose whether to use sync or async code.

Note: using Task.Run to delegate some tasks to a ThreadPool while keeping the UI responsive is generally okay

No Task.Run in a library

This rule is related to the previous one. Callers should be the ones to call Task.Run because they have control on the execution context. Functionnally, Task.Run will work but also introduce performance issue because of an additional thread switch.
Additionnally, if a library needs to support both sync and async methods, there should be no relation between them. We can't use async calls in sync code, or we might run into deadlock issues.

Do not use async void
public async void FooAsync()
    {
        await client.DownloadAsync();
    }
As there is no Task object to be returned, exceptions cannot be captured and will be posted in the SynchronizationContext (UI Thread for example).
Also, the caller is unable to know when the execution has finished, it's a "fire and forget" mechanism.

Instead, use

public async Task FooAsync()
    {
        await client.DownloadAsync();
    }

Wednesday, September 4, 2019

Leading a software project from A to Z

Although building a project from ground up is a very challenging task that requires solid nerves, patience, attention to details, good communication skills and mostly motivation, it is also the most interesting work that you will do in your career. You will live the full adventure, not just a part of it where you're usually asked to do something with little to no freedom at all. This time, you are setting up the rules, you are picking the tools and the technologies and you are designing YOUR solution.

Here are some rules that you better follow if you don't want to turn your project into a nightmare.

1. Do a pre-study


The initial requirements are usually very general, giving an overview of what we want but not how to make it. Even if I tell you to develop the exact same watch as the Fitbit Ionic, you can't just rush into the development. You will have to understand the technology, analyze the materials, define how the product shall interact with user, computers, etc...

Build a solid pre-sudy document where every aspect of the product is described, eventually listing different potential solutions with pros and cons. This will naturally lead you to your next step : the product architecture specification.

2. Take all the time you need to write good specifications


Spoiler alert: if you were to develop your product alone, this step is where you would spend one third of your time.

Business managers will always push you to provide the product asap, never caring about QUALITY. To be honest, they do care but differently:

  • For developers, quality is all about architecture, code metrics, tests
  • For business managers, quality is about functional aspects. As long as it works, the quality level is high
  • For QA, quality means following the process. Are all the documents ready and signed ? If yes, quality is alright

What about clients ?

Clients will always want the best product for their money. Their quality perception is based on usability, performances, materials, robustness and ... support services !
If a company cannot sustain its own products, it will dig its own grave because of its high operational cost.

How to prevent this ?

It all starts with specifications. Developers complain about documents that we write but never read and there is a little bit of truth but the exercice worth it because it will highlight many aspects that you'd have ignored in your design (error cases, serviceability, deployability, update startegy, ...).

Where do I start ?

My advice is that you first create diagrams to visualize the features. If your project is not 100% software, then create an SADT diagram with interactions between functions (or go for sysML if you have time). Doing this will help you to distribute the functions between hardware and software.


Now, on software side, think about a design concept and try to put it in a document where you'll elaborate the following points:

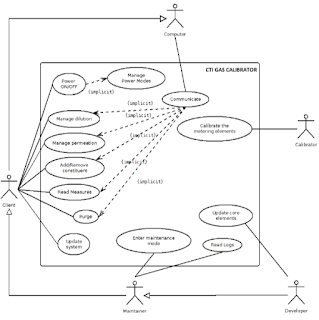
* Use case view: Think about how the users will access/use your product and put it in a simple UML Use Case diagram


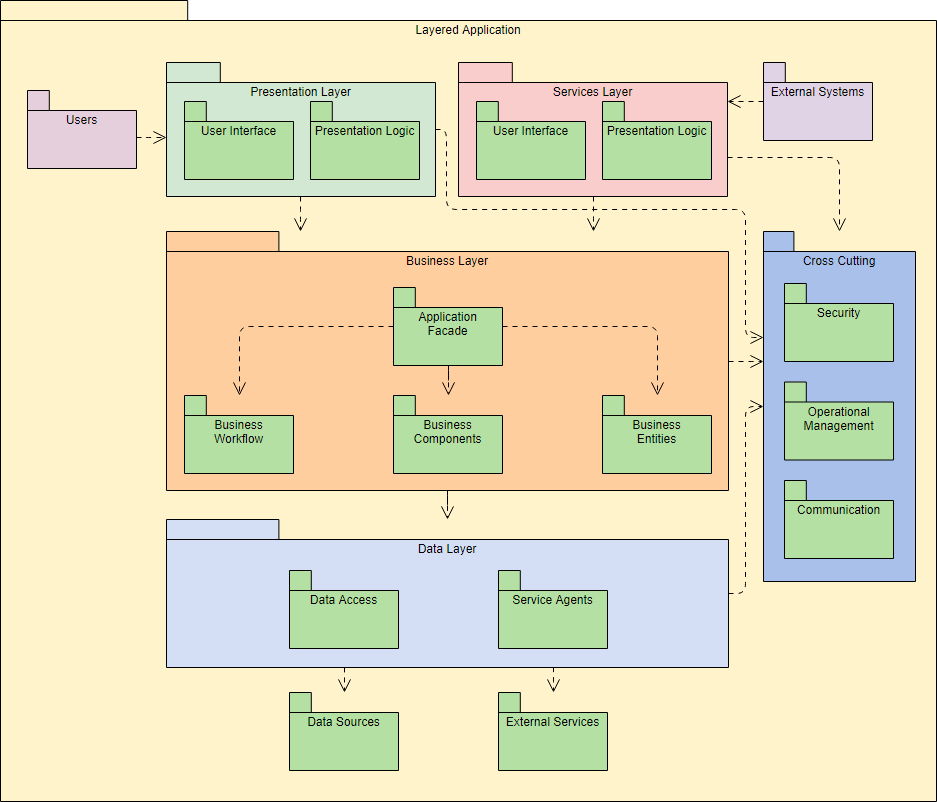
* Development view: define the modules that will compose your software and use a diagram to show how they'll interact with simple arrows. For instance, this is where I usually put my layered architecture overview


* Logical view: Use this part to define your objects/interfaces. Do not go into details ! At this stage, we just want to understand the intent of each module. I usually insert class diagrams with my interfaces in here.


* Process view: Up to here, the reader only had a static overview of your design. Now you tell him how the modules that you described will behave at runtime (processes, threads, message queues, timers, ...). If the product has performance requirement, explain how they'll be met here.

* Components/package view: A package is a deployable unit. How will you organize your modules/components into these packages ?

Résultat de recherche d'images pour "package diagram"

Once done, you can move forward with the Software Requirements Specifications (usually called SRS). I strongly recommend you to google 'IEEE SRS' and to get inspired by the IEEE template. It gives very good indications on how your specifications should be written.

In a nutshell:
  • Each requirement shall be testable: do not use vague words like 'hot', 'cold', 'fast enough' ... Give concrete values that a tester can validate.
  • Each requirement shall be uniquely identified: use IDs for all of your requirements. They will be used for traceability in the entire V cycle.
  • Split the specifications following the component structure that you defined in the design concept. For each component, define the inputs, the processing and the outputs
  • For views, insert mockups and specify the actions of each control

3. Pick up your gears


Some technology choices might already be defined at this stage (they influence your design concept). If not, select the frameworks, development environments, source code manager, issue tracker and all other tools that will be necessary to develop/build/deploy your project.
This information usually goes into a 'quality plan' document. This is also where we usually define the branching model, coding rules, planning overview... DO THIS. Especially if you're a team of developers. You'll notice inconsistencies in code, in source code manager and/or in issue tracker if you don't specify the rules somewhere.

4. Organize the work


The components you defined have natural dependencies with each others. Focus on the ones that have less dependencies first.

Tasks
For each components, create a story/task in your issue tracking tool. This task can be broken down into smaller tasks by the developer when taken care of. Evaluate the difficulty of developments for each task and rate them properly either by duration or with story points (recommended).
If you're lucky to work with tools like Jira, create epics for the features that you'd like to implement and organize your tasks. At the very beginning, you can create an epic for the first prototype.

Milestones
Your business manager expects only one delivery but creating intermediate releases along the way is very helpful for demos, regression investigation, test of deployments/updates...
Define the milestones (v1.0.0, v1.1.0, v1.2.0...) and detail what's going to be included in each of them. Be realistic with delivery dates and do not try to anticipate too much. See, when managing a project, people tend to make promises and set unrealistic release dates. In the end, almost all the projects I've seen have been delayed and the funny fact is that it wasn't even due to the development. Clients can make new requests or change existing ones, business can down-prioritize your project, one of the technology used can be not supported anymore, a key developer can resign ... Unexpected things will happen for sure, be prepared.

Ideally, adopt agile methodology and work in sprints.

5. Plan -> Execute -> Check -> Act -> Plan ...


Note: If you're working agile, you're already covering this.

Always re-assess your software requirements depending on business needs. Ideally, bring the client into the loop and ensure that he is aligned with your plan and satisfied with your latest features. If not, plan for the changes and execute.

Also, even if it seems obvious to me, unit tests are not optional. I really encourage you to track your metrics during this phase and to do the efforts to keep them in the green zone.

If you're coordinating other developers, make sure they always understand what they should do. If necessary, take time to explain them your design over and over again. Don't be afraid of repeating things, it can be annoying but you have to be tolerant with your manpower as much as possible.

6. Release often


If your milestone is supposed to end in 3 months, do not wait 3 months to release.
Releasing means bringing all the features together, versioning and deploying. Do it at least at the end of each sprint (if you're not working agile, plan weekly builds). It will reduce the integration penalty and, ideally, will allow you to anticipate on functional/user acceptance tests.

For the versioning, we usually use 3 digits to do this:
  • Major: Only incremented when major changes are made to the code with an impact for the end-user.
  • Minor: Only incremented when minor changes are made to the code without really changing the features but rather extending them slightly. "Look and feel" changes are also usually considered to be minor changes if they do not impact the UX (e.g. usability) heavily.
  • Micro/Build: Incremented for code rework, minor bug fixes, improvement of test coverage, ...

It's not a rule though, you're free to use your own versioning as long as it is consistent over time and that it helps you to identify your software easily.


7. Validation


Most neglected aspect that nevertheless makes a total difference if executed properly, the validation is in my eyes a must-do. Ideally, try to think about validation when writing functional requirements because each of the requirement will need to be testable. If a requirement is too vague to be tested, it can't be implemented, just as simple as that. As a V&V engineer, I should be able to write my test plan based on the functional requirements without any doubt on what needs to be tested.

To illustrate this, here are some examples:

Req 1.1: As a driver, when I press the brakes pedal, my car should stop.

NOT TESTABLE: I see at least 2 reasons :
  • this requirement is not time-bound: if my test proves that the car stops after 30 minutes, the system is valid. 
  • 'should' to be replaced by 'shall'. We want no doubt about what the system shall do.

Req 1.1: As a driver, when I press the brakes pedal, my car shall stop within x seconds with x given with the following relation: x = (speed/10)²

TESTABLE

8. Conclusion


This article gives you an overview of what you'll have to do if you drive a project and lots of other aspects have not been detailed such as reporting, interfacing with other stakeholders, CI/CD ... It can be scary and you'll make mistakes (all of us do) but as long as you try to setup a framework for you and your team and keep executing as defined, you'll be right enough. As a developer, I like to have consistency in my code. Well, as I project leader, I like to have consistency in my project & team.


biz.